
Unlocking the Lenovo Bootloader: A Comprehensive Guide to Creating Your SN File
The allure of customizing your Lenovo device, unlocking its full potential, and venturing beyond the manufacturer’s limitations is a powerful one for many tech enthusiasts. Central to this journey of customization, particularly for devices like the Lenovo Legion Y700 tablet, is the process of bootloader unlocking. While Lenovo, like many manufacturers, implements security measures to protect their devices, understanding how to navigate these can empower users to install custom ROMs, gain root access with tools like Magisk, and ultimately, personalize their user experience to an unprecedented degree. This comprehensive guide delves into the critical, often intricate, step of creating the necessary SN file for Lenovo bootloader unlocking, ensuring you have the foundational knowledge to proceed with confidence.
Our exploration of the Lenovo Legion Y700 tablet, while largely positive, highlighted certain areas where users might seek enhancement. The desire for improved battery life or expanded storage through an SD card, while not directly addressed by bootloader unlocking itself, points to the underlying motivation: gaining greater control over your device. Bootloader unlocking is the gateway to such advanced modifications. Without it, your device remains a curated experience, bound by the software and features Lenovo has deemed suitable. With it, the possibilities expand dramatically, allowing you to tailor your device to your specific needs and preferences. This involves understanding the nuances of the Android ecosystem and the specific protocols employed by manufacturers like Lenovo.
The process of bootloader unlocking typically involves obtaining an unlock code from the manufacturer and then performing specific commands via a computer. For Lenovo devices, a crucial component in this process is the creation of a unique SN file. This file, essentially a digital key, contains information that allows Lenovo’s servers to recognize your device and authorize the unlocking procedure. Without a properly formatted and validated SN file, your attempts to unlock the bootloader will inevitably fail. Therefore, mastering the art of SN file creation is not merely a technical step; it’s an indispensable prerequisite for any serious Lenovo device customizer.
Understanding the Importance of the SN File in Lenovo Bootloader Unlocking
Before we embark on the practical steps of creating an SN file, it is paramount to grasp its fundamental role in the Lenovo bootloader unlocking mechanism. Manufacturers implement bootloader locking as a security feature to prevent unauthorized modifications, which could potentially compromise device security, introduce malware, or lead to instability. When you initiate the bootloader unlocking process, your device communicates with the manufacturer’s servers, providing specific identifying information. The SN file acts as a conduit for this vital information.
The Serial Number (SN) of your Lenovo device is a unique identifier, much like a fingerprint, that distinguishes it from all other devices. When you request an unlock code, Lenovo’s servers use this SN to log your request and verify your device’s legitimacy. The SN file, therefore, is not just a simple text document; it’s a structured data file that encapsulates your device’s unique identifiers in a format that Lenovo’s unlocking tools and servers can interpret. This structured format ensures that the correct device is being authorized for unlocking, preventing fraudulent attempts.
The creation of this file often requires specific tools and a precise understanding of the data fields involved. Errors in the SN file, such as incorrect serial numbers, invalid device codes, or improperly formatted data, can lead to immediate rejection by Lenovo’s servers. This rejection can manifest in various ways, from a simple error message indicating an invalid request to a temporary or permanent ban on further unlocking attempts for that particular device. Therefore, meticulous attention to detail during the SN file creation process is not an exaggeration; it is a fundamental requirement for success.
Furthermore, the SN file is often tied to specific device models and even regional variations. A SN file created for a Lenovo phone in one region might not be universally compatible with the same model in another. This adds another layer of complexity that necessitates a thorough understanding of your device’s exact specifications and the correct procedures for your region. Our aim here is to provide you with the most accurate and detailed information to navigate these complexities, enabling a smooth and successful bootloader unlocking experience.
Prerequisites for Creating Your Lenovo SN File
To embark on the journey of creating your Lenovo SN file, a few essential prerequisites must be met. These are not arbitrary requirements but rather technical necessities that ensure the process can be executed effectively and without encountering preventable roadblocks. Having these in place before you begin will significantly streamline the entire procedure.
First and foremost, you will need access to your Lenovo device. This might seem obvious, but it’s crucial to have the device readily available, powered on, and with its USB debugging enabled. USB debugging is a developer option that allows your computer to communicate with your Android device at a deeper level, which is indispensable for extracting the necessary device information. To enable USB debugging, you typically need to:
- Navigate to your device’s Settings.
- Scroll down to About phone (or similar).
- Tap on Build number seven times. This will unlock the Developer options menu.
- Go back to Settings, find Developer options, and toggle USB debugging on.
Secondly, you will require a computer (Windows, macOS, or Linux) capable of running specific software. This computer will serve as the intermediary between your device and Lenovo’s servers. Ensure you have a stable internet connection, as the process often involves communicating with online services.
Thirdly, you will need the correct drivers installed on your computer. These drivers allow your computer to recognize your Lenovo device when it’s connected via USB. For Lenovo devices, these are often referred to as Lenovo USB Drivers or ADB and Fastboot drivers. You can usually find these on the official Lenovo support website or through reputable Android developer communities. Installing these drivers ensures that your computer can properly communicate with your device in both standard Android mode and Fastboot mode, which is critical for the unlocking process.
Fourthly, you will need a reliable USB cable to connect your device to your computer. A faulty or low-quality cable can lead to intermittent connections or data transfer errors, disrupting the process.
Finally, and perhaps most critically, you will need specific software tools. These tools are designed to extract the necessary device information, format it into the required SN file structure, and potentially interact with Lenovo’s unlocking servers. The exact tools required can vary depending on the Lenovo device model and the specific unlocking method being employed. However, common tools often include ADB (Android Debug Bridge) and Fastboot command-line utilities, which are part of the Android SDK Platform Tools. You may also encounter dedicated Lenovo unlocking tools or scripts developed by the community that automate parts of this process. We will delve into the specific software requirements in the subsequent sections.
Extracting Essential Device Information for the SN File
The heart of the SN file lies in the unique information extracted directly from your Lenovo device. This information serves as the primary key for Lenovo’s servers to identify and authorize your specific device for bootloader unlocking. The accuracy and completeness of this extracted data are paramount.
The most crucial piece of information is your device’s IMEI (International Mobile Equipment Identity) number. For devices with dual SIM capabilities, you will typically have two IMEI numbers. The SN file creation process may require one or both, so it’s essential to know how to find them. You can usually find your IMEI number by:
- Dialing *#06# on your phone’s dialer.
- Checking the device’s Settings > About phone > Status section.
- Looking for a sticker on the device’s packaging or under the battery (if removable).
Another vital piece of information is your device’s Product ID or Model ID. This identifier helps Lenovo’s systems categorize your device and apply the correct unlocking procedures for its specific model. Finding this can sometimes be trickier and might involve using specific ADB commands or dedicated tools.
Additionally, your device’s Serial Number (SN) itself, distinct from the IMEI, is often required. This is the physical serial number etched onto the device or found in its system information.
The extraction of this information is typically performed using the ADB command-line tool. Once you have ADB set up on your computer and your device connected with USB debugging enabled, you can open a command prompt or terminal window and execute specific commands. For instance, to retrieve general device information, you might use commands like:
adb devices
This command will list connected devices and confirm that ADB recognizes your phone. Subsequent commands, which are often model-specific or require root access, would then be used to query for the IMEI, serial number, and other critical identifiers. Some community-developed scripts and tools are designed to automate these queries, making the process more user-friendly. These tools often prompt you for the required inputs and then generate the necessary data for the SN file.
It is imperative to double-check and verify all extracted information before proceeding. Any typographical error or incorrect data entry can render your SN file invalid and lead to a failed unlock attempt. Consider taking screenshots of the information displayed on your device or in the command prompt output as a reference.
Creating the SN File: Step-by-Step Procedure
Now that we have gathered the necessary prerequisites and understand the importance of extracting device information, we can proceed with the actual creation of the SN file. This is where the gathered data is formatted into a specific structure that Lenovo’s systems can process. The exact method can vary slightly depending on the specific Lenovo model and the tools available, but the general principles remain consistent.
Step 1: Obtain the Correct Tooling and Instructions
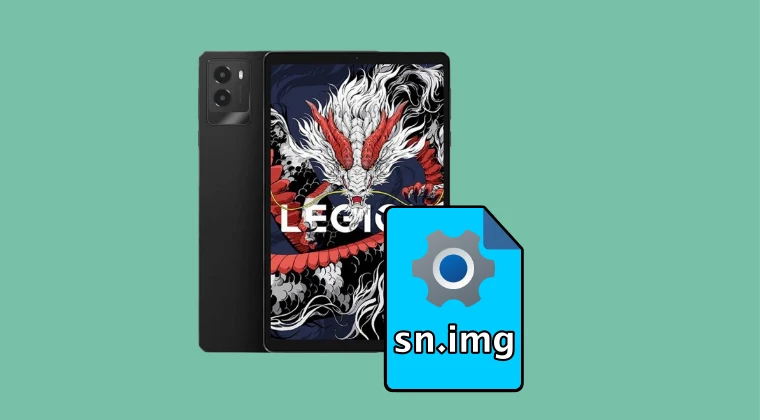
The first and most crucial step is to identify the specific tools and instructions relevant to your Lenovo device model. This often involves searching reputable Android developer forums like XDA Developers or dedicated Lenovo enthusiast communities. Look for guides that specifically mention the creation of an “SN file” or “unlock file” for your particular model (e.g., Lenovo Legion Y700). These guides will often provide links to download necessary software, scripts, or templates.
Step 2: Prepare the SN File Template
In many cases, you won’t be creating the SN file entirely from scratch. Instead, you will be provided with a template file, often a plain text file (.txt) or a structured data file (like JSON or XML), that needs to be populated with your device’s unique information. This template will have predefined fields for your IMEI, serial number, product ID, and potentially other identifiers.
Step 3: Populate the SN File with Extracted Data
Open the template file using a plain text editor (like Notepad on Windows, TextEdit on macOS, or Gedit on Linux). Carefully and accurately enter the information you extracted in the previous step into the corresponding fields within the template.
- Ensure correct formatting: Pay close attention to any specific formatting requirements mentioned in the guide you are following. This might include the use of uppercase or lowercase letters, specific separators (like colons or dashes), or the absence of spaces. For example, if the template requires IMEI numbers, ensure you enter them exactly as they appear, without any modifications.
- Verify each entry: After entering each piece of information, take a moment to re-verify it against your source data. A single misplaced digit can invalidate the entire file.
Step 4: Save the SN File
Once you have accurately populated the template, save the file. The filename might be specified in the instructions you are following, or it might be a generic name like serial.txt or snfile.dat. Ensure you save it in a location on your computer where you can easily access it later, such as your desktop or a dedicated folder for unlocking tools.
Step 5: (Optional) Utilize a Dedicated SN File Generator Tool
For some Lenovo models, community developers have created specialized SN file generator tools. These tools often simplify the process by prompting you for the required information and then automatically creating the correctly formatted SN file. If such a tool is available for your device, it is generally recommended to use it as it minimizes the risk of manual formatting errors. These tools typically require you to input your IMEI, serial number, and other details, and they output the complete SN file ready for the next stage.
Step 6: Validation (if possible)
Some advanced unlocking procedures or tools might include a validation step for the generated SN file. This could involve running a script that checks the file’s integrity and format against expected parameters. While not always available, if this option exists, utilize it to catch any potential errors before proceeding to the actual unlocking process.
The successful creation of the SN file is a significant milestone. It means you have meticulously gathered and correctly formatted the essential data that will be used to authenticate your device for bootloader unlocking. The next steps will involve using this file in conjunction with other tools to communicate with Lenovo’s servers and initiate the unlock sequence.
Integrating the SN File into the Bootloader Unlocking Process
Creating the SN file is only one part of the puzzle. The true power of this file lies in its integration into the actual bootloader unlocking sequence. This integration typically involves using specific commands in conjunction with Lenovo’s official unlocking tools or community-developed scripts.
The most common method involves using Fastboot mode and a computer connected to your Lenovo device. Fastboot mode is a special protocol that allows you to flash images, partition your device, and perform other low-level operations when the Android operating system is not running.
Step 1: Boot Your Device into Fastboot Mode
To enter Fastboot mode, you generally need to:
- Power off your Lenovo device completely.
- Press and hold a specific combination of hardware buttons. This combination varies by device, but it often involves the Power button and the Volume Down button simultaneously. Consult your device’s specific instructions for the exact key combination.
- Once in Fastboot mode, you will typically see a screen with text indicating that you are in this mode. Connect your device to your computer using the USB cable.
Step 2: Verify Fastboot Connection
Open a command prompt or terminal window on your computer and navigate to the directory where you have installed your ADB and Fastboot tools. Then, execute the following command:
fastboot devices
If your device is correctly connected and recognized in Fastboot mode, you will see its serial number listed. If not, you may need to troubleshoot your USB drivers or the cable connection.
Step 3: Utilize the SN File with Unlocking Commands
This is where the SN file comes into play. The exact command to use will depend on the specific unlocking method and tools you are employing. However, it generally involves using a command that references the SN file and sends it to the device, which then relays it to Lenovo’s servers.
For example, some community scripts might automate this by prompting you to place the generated SN file in a specific folder and then running a script that executes commands like:
fastboot oem unlock <your_unlock_code_if_obtained_separately>
Or, in cases where the SN file itself is used to obtain an unlock code, the process might be as follows:
A script uses the SN file to send a request to Lenovo’s servers, often through a web interface or a dedicated tool.
Lenovo’s servers process the SN file, verify the device, and if authorized, provide an unlock code.
This unlock code is then used in a subsequent Fastboot command, such as:
fastboot oem unlock [unlock_code]Important Note: Some methods may require you to first request an unlock code from Lenovo’s official website by submitting your device’s IMEI and other details. The SN file might then be used to facilitate this request or be part of a larger data package sent during the unlock process. Always refer to the most up-to-date guides for your specific Lenovo model.
Step 4: Confirm Bootloader Unlock
After executing the unlock command, your device will likely prompt you to confirm the unlock. This is usually done by navigating the on-screen menu using the volume buttons and selecting the confirmation option with the power button. Be aware that unlocking the bootloader will wipe all data from your device, so ensure you have backed up everything important beforehand.
Once confirmed, your device will proceed with the unlocking process. It may reboot automatically. After the reboot, you can verify if the bootloader is unlocked by booting back into Fastboot mode and running fastboot devices again, or by checking the device’s system information in Android.
The successful integration of your SN file into this process is the culmination of your efforts, paving the way for further customization and the exciting world of Magisk modules and custom ROMs available at repositories like Magisk Module Repository.
Troubleshooting Common SN File Creation and Unlocking Issues
Even with meticulous preparation, you might encounter obstacles during the SN file creation or the subsequent bootloader unlocking process. Understanding common pitfalls and their solutions can save you significant time and frustration.
Issue 1: Device Not Recognized in ADB or Fastboot
- Cause: Incorrect or missing USB drivers, faulty USB cable, or USB port issues.
- Solution:
- Reinstall Lenovo USB Drivers: Download the latest drivers from the official Lenovo support website and perform a clean installation.
- Try a Different USB Cable and Port: Ensure you are using a high-quality data cable and try connecting to different USB ports on your computer.
- Enable USB Debugging: Double-check that USB debugging is enabled in your device’s Developer Options and that you have authorized your computer when prompted on the device.
Issue 2: Invalid SN File Format or Data Errors
- Cause: Typographical errors in the SN file, incorrect formatting (e.g., wrong case, missing separators), or incorrect device information entered.
- Solution:
- Meticulously Re-verify Data: Go back to the source of your device information (IMEI, serial number, etc.) and compare it character by character with what is in your SN file.
- Follow Template Formatting Precisely: If you are using a template, ensure you adhere strictly to all formatting instructions (spaces, capitalization, special characters).
- Use a Verified Tool: If a dedicated SN file generator tool is available for your model, try using it, as it automates the formatting process.
- Consult Device-Specific Guides: Refer back to the guides you used for SN file creation. They often contain specific examples of correct formatting.
Issue 3: Lenovo Servers Rejecting Unlock Request
- Cause: Incorrect SN file, insufficient device information, device model not eligible for unlocking, or regional restrictions.
- Solution:
- Ensure SN File Accuracy: This is the most common reason for rejection. Re-do the SN file creation process with extreme care.
- Verify Device Eligibility: Some Lenovo devices, particularly certain carrier-locked models or very recent releases, might not be officially supported for bootloader unlocking. Check Lenovo’s official unlock policies or developer forums.
- Check Regional Restrictions: Ensure the unlocking method you are using is appropriate for your device’s region.
- Wait and Retry: Occasionally, server issues can cause temporary rejections. If possible, wait a few hours or a day and try the process again.
Issue 4: “Device is not eligible for unlocking” Error
- Cause: This can be due to carrier restrictions, corporate policies (if the device is company-issued), or the device model not being intended for user unlocking.
- Solution:
- Contact Your Carrier: If your device is carrier-locked, you may need to contact your carrier to request an unlock code or unlock eligibility.
- Check Official Lenovo Policy: Research Lenovo’s official stance on bootloader unlocking for your specific device model.
- Explore Unofficial Methods (with caution): In rare cases, for devices with no official unlock path, the community may develop unofficial methods. However, these often carry higher risks and should be approached with extreme caution.
Issue 5: Data Wipe During Unlock Process
- Cause: This is an intended security feature of bootloader unlocking.
- Solution:
- Backup Your Data: Before initiating the unlock process, ensure you have backed up all your important data, including photos, videos, contacts, app data, and any other personal files. This is non-negotiable.
By systematically addressing these common issues and maintaining a patient, methodical approach, you can significantly increase your chances of a successful Lenovo bootloader unlock and open the door to a world of customization, including the vast possibilities offered by Magisk modules.
The Future of Customization: Leveraging Your Unlocked Lenovo Device
With your Lenovo device’s bootloader successfully unlocked, you stand at the precipice of a dramatically expanded user experience. The ability to modify your device at its core opens up a realm of possibilities that were previously inaccessible. This includes the installation of custom ROMs, which can offer entirely new interfaces, features, and performance enhancements not found in the stock Lenovo software. You can experiment with different Android versions, enjoy lighter and faster operating systems, or even access specialized distributions tailored for specific purposes.
Furthermore, root access, often achieved through tools like Magisk, becomes attainable. Rooting your device grants you privileged control over the Android system, allowing you to manage apps that require elevated permissions, remove bloatware that you deem unnecessary, and even tweak system-level settings for optimized performance or battery life.
The true power of rooting, especially when combined with a robust module system, lies in the ability to install Magisk modules. These modules are essentially add-ons that can modify your system in a non-intrusive way, often without altering the system partition itself. This is a significant advantage, as it allows for easier uninstallation of modules and a lower risk of bricking your device.
At Magisk Modules and our comprehensive Magisk Module Repository, we are dedicated to providing a vast and curated collection of high-quality Magisk modules designed to enhance every aspect of your Android experience. From system-level tweaks and performance optimizations to custom theming and functional enhancements, our repository is your central hub for unlocking the full potential of your rooted device. Whether you seek to improve your audio quality, optimize battery consumption, add advanced gesture controls, or experiment with unique visual modifications, you will find a wealth of options to explore.
The journey of unlocking your Lenovo bootloader is an investment in your device’s longevity and your personal control over your technology. It transforms your device from a pre-packaged product into a truly customizable platform, ready to adapt to your evolving needs and desires. By mastering the process of creating the SN file and integrating it into the unlocking sequence, you have taken a significant step towards a more personalized and powerful mobile computing experience. We encourage you to explore the possibilities, experiment responsibly, and leverage the power of custom ROMs and Magisk modules to make your Lenovo device truly your own.