
How to Relock Bootloader on Samsung Devices: A Comprehensive Guide
In the ever-evolving landscape of Android customization and device management, understanding the intricacies of your Samsung device’s bootloader is paramount. While many users delve into unlocking the bootloader to explore custom ROMs, root their devices with Magisk, or implement other advanced modifications, there often comes a time when reverting to a more secure, stock configuration is desired. This guide provides an in-depth, step-by-step walkthrough on how to relock the bootloader on your Samsung device, ensuring a safe and effective transition back to its original state. We acknowledge that Samsung devices present a unique approach to firmware management, often utilizing Download Mode rather than the more commonly encountered Fastboot Mode, and employing dedicated flashing tools instead of standard Fastboot commands. This distinction is crucial and will be addressed thoroughly within these instructions.
At Magisk Modules, we understand the importance of having complete control over your device, whether it’s for enhancing its capabilities with our extensive Magisk Module Repository or for returning it to a pristine, locked state for security or resale purposes. Relocking the bootloader is not merely an administrative task; it’s a critical step in restoring your device’s integrity and security. This process ensures that only officially signed software can be loaded onto your device, acting as a robust defense against unauthorized modifications and potential security threats.
Understanding the Significance of a Locked Bootloader
Before we embark on the technical steps, it’s essential to grasp why a locked bootloader is the default and recommended state for most users. The bootloader is the very first piece of software that runs when you power on your device. Its primary function is to initialize the hardware and then load the operating system. When a bootloader is locked, it enforces a strict security protocol: it will only allow the loading of digitally signed firmware from the manufacturer. For Samsung devices, this means only official Samsung firmware packages will be accepted.
This inherent security measure prevents malicious actors from flashing unauthorized or compromised software onto your device, which could lead to data theft, malware infections, or bricking the device permanently. Furthermore, many manufacturer-specific applications and services, including Samsung Pay and certain banking apps, rely on the bootloader remaining locked to function correctly due to security checks they perform. Relocking the bootloader is, therefore, not just about returning to stock; it’s about restoring these essential security layers and functionalities.
Prerequisites for Relocking the Bootloader
Successfully relocking your Samsung device’s bootloader requires careful preparation. Skipping any of these crucial steps can lead to complications, including the dreaded “bootloop” or even a bricked device. Therefore, we urge you to read and understand each prerequisite before proceeding.
#### 1. Back Up All Your Data
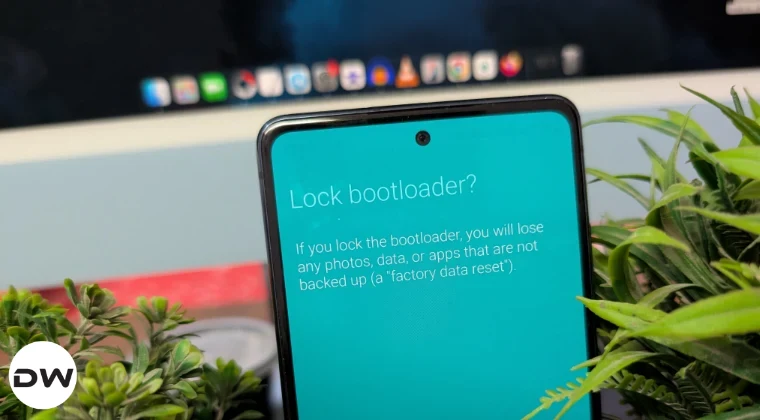
This is, without question, the most critical step. The process of relocking the bootloader on a Samsung device typically involves a factory reset, which will erase all data from your internal storage. This includes photos, videos, documents, app data, contacts, messages, and any other personal files.
- Comprehensive Backup Strategy: We strongly recommend a multi-pronged backup approach.
- Cloud Services: Utilize services like Google Photos for images and videos, Google Drive or Dropbox for documents and other files. Ensure these are fully synced before you begin.
- PC Transfer: Connect your device to a computer via USB and manually copy all important folders and files from your internal storage to your hard drive.
- Samsung Smart Switch: If available and compatible with your device and operating system version, Samsung’s proprietary tool can be an excellent option for backing up contacts, messages, call logs, and more to your PC.
- App-Specific Backups: For applications that store important data locally (e.g., certain note-taking apps, financial apps), check within the app settings for their own backup or export options.
#### 2. Obtain the Correct Official Firmware
To relock the bootloader, you will essentially be flashing a stock, official firmware package back onto your device. It is imperative that you download the exact firmware version that is currently installed on your device or a compatible, newer official version. Flashing an incorrect firmware can lead to compatibility issues, device instability, or even render your device unusable.
- Identifying Your Device Model and CSC: You need to know your precise Samsung model number (e.g., SM-G998B for a Galaxy S21 Ultra) and its Country Specific Code (CSC). The CSC determines regional features and carrier customizations. You can usually find this information in your device’s Settings > About phone. If not immediately visible, it may be under “Software information.”
- Reliable Firmware Sources: While direct downloads from Samsung are rare, reputable third-party firmware repositories exist. Exercise caution and use well-known, trusted sources that verify firmware integrity. Websites like SamMobile or Frija (a tool that can download firmware directly from Samsung servers) are commonly used by the community. Ensure the firmware file is for your exact model and region.
- Understanding Firmware Components: Official Samsung firmware packages typically consist of several files, often named
AP,BL,CP, andCSC(orHOME_CSC). For relocking, you will primarily be interested in theAP,BL,CP, andCSCfiles. TheHOME_CSCfile is used for updates that aim to preserve user data, but for a clean relock and reset, the standardCSCfile (which triggers a data wipe) is usually preferred.
#### 3. Install Samsung USB Drivers
Your computer needs to be able to communicate with your Samsung device when it’s in Download Mode. This requires the installation of the correct Samsung USB Drivers.
- Download and Installation: You can typically find these drivers on Samsung’s official website or through reputable Android development resources. Download the latest version and run the installer on your Windows PC. It’s often advisable to restart your computer after installation to ensure the drivers are properly registered.
#### 4. Download Odin Flashing Tool
Odin is the official Samsung firmware flashing tool used for Windows. It is the primary utility through which you will apply the official firmware to your device.
- Obtaining Odin: Download the latest stable version of Odin from a trusted source. Be wary of unofficial modifications or older versions, as they might be less stable or even contain malware.
- Extracting Odin: Odin is usually distributed as a ZIP archive. Extract its contents to a easily accessible folder on your computer.
#### 5. Charge Your Device
Ensure your Samsung device has a sufficient battery charge, ideally above 70%, before you begin the flashing process. A power interruption during a firmware flash can have catastrophic consequences, potentially leading to a bricked device.
Step-by-Step Guide to Relocking Your Samsung Device’s Bootloader
With all prerequisites met, we can now proceed with the technical steps. This process involves putting your device into Download Mode and using Odin to flash the official firmware.
## Entering Download Mode
Download Mode is Samsung’s equivalent of Fastboot Mode, a special environment designed for flashing firmware. The method to enter Download Mode can vary slightly depending on your device’s model and whether it has a physical Home button.
#### Method 1: Devices with Physical Home Button (Older Models)
- Power Off Your Device: Completely shut down your Samsung device.
- Press and Hold Buttons: Simultaneously press and hold the Volume Down, Home, and Power buttons.
- Continue Holding: Keep holding these buttons until you see a warning screen with a blue or green background.
- Confirm Entry: On the warning screen, press the Volume Up button to continue and enter Download Mode. You will see a screen with “Downloading…” text.
#### Method 2: Devices Without Physical Home Button (Most Newer Models)
- Power Off Your Device: Ensure your Samsung device is completely powered off.
- Connect USB Cable: Connect your device to your PC using a USB cable.
- Press and Hold Buttons: While the device is connected to the PC, press and hold the Volume Up and Volume Down buttons simultaneously.
- Continue Holding: Keep holding these buttons until you see the warning screen.
- Confirm Entry: On the warning screen, press the Volume Up button to continue and enter Download Mode.
## Flashing Official Firmware with Odin
Once your device is in Download Mode and connected to your PC, you can use Odin to flash the official firmware. This process will wipe your device and restore it to its stock state, effectively relocking the bootloader.
- Launch Odin: Navigate to the folder where you extracted Odin and run the Odin executable file (usually named
Odin3 vX.XX.exe) as an administrator. Right-click on the file and select “Run as administrator.” - Connect Device to PC: Ensure your Samsung device is still connected to your PC via USB. Odin should detect your device, and you will see a message in the ID:COM box change color (usually blue) and display a COM port number (e.g., “COM3”). If the box remains gray, ensure your Samsung USB drivers are installed correctly and try a different USB port or cable.
- Load Firmware Files: This is where you’ll use the firmware files you downloaded earlier.
- Click the BL button in Odin and select the firmware file that starts with
BL_. - Click the AP button in Odin and select the firmware file that starts with
AP_. This file is often the largest and may take some time for Odin to load and verify. - Click the CP button in Odin and select the firmware file that starts with
CP_. - Click the CSC button in Odin and select the firmware file that starts with
CSC_. Crucially, ensure you select theCSC_file and NOT theHOME_CSC_file if you want to perform a full factory reset and ensure a clean relock. TheCSC_file will wipe your device’s data.
- Click the BL button in Odin and select the firmware file that starts with
- Configure Odin Options:
- Navigate to the Options tab in Odin.
- Ensure that “Auto Reboot” and “F. Reset Time” are checked.
- Crucially, UNCHECK “Re-Partition.” This option should only be used in very specific, advanced scenarios and can be dangerous if misused. For a standard firmware flash and bootloader relock, it must be disabled.
- Other options like “Nand Erase” should generally not be checked unless explicitly instructed by a highly trusted source for a specific troubleshooting scenario. For a standard relock, leaving them as default (beyond Auto Reboot and F. Reset Time) is recommended.
- Start the Flash: Once all firmware files are loaded and the Odin options are correctly configured, click the “Start” button.
- Monitor the Process: Odin will now begin flashing the firmware to your device. You will see a progress bar in Odin, and your device’s screen will also show a flashing progress indicator. Do not disconnect the USB cable, power off your computer, or interrupt the process in any way. This can take several minutes, depending on the size of the firmware.
- Completion: When the flashing process is successfully completed, Odin will display a “PASS!” message in a green box. Your device will automatically reboot.
## Post-Flash: Verifying the Relock and Initial Setup
After the flashing process, your device will boot up as if it were brand new, performing its initial setup.
- Device Reboot: Your Samsung device will restart, and you will be greeted by the initial setup wizard, similar to when you first unboxed the phone.
- Complete Setup: Proceed through the setup wizard, connecting to Wi-Fi, signing into your Google account, and restoring your data from your backups.
- Verify Bootloader Status: To confirm that the bootloader has been successfully relocked, you can re-enter Download Mode.
- Power off your device.
- Enter Download Mode using the methods described earlier.
- Once in Download Mode, look for a line on the screen that indicates the Bootloader Status. It should now clearly state “LOCKED” or something similar. If it still says “UNLOCKED,” the process may not have completed successfully, or there might be a residual flag on your device. In such rare cases, repeating the Odin flash with the correct
CSC_file is recommended.
## Additional Considerations and Troubleshooting
While the process is generally straightforward, some users might encounter issues. Here are some common scenarios and their solutions:
#### Potential Issues and Solutions
- Odin Fails or Device Not Detected:
- Check USB Drivers: Ensure you have the latest Samsung USB drivers installed correctly. Try reinstalling them.
- Different USB Cable/Port: Faulty cables or USB ports can cause connection issues. Try a high-quality original USB cable and a different USB port on your computer.
- Run Odin as Administrator: Always launch Odin with administrative privileges.
- Antivirus Interference: Temporarily disable your antivirus software, as it might be interfering with Odin’s communication.
- Device Stuck in Bootloop: If your device gets stuck on the Samsung logo or the boot animation after flashing, it usually indicates an incomplete or incorrect firmware flash.
- Re-flash Firmware: Carefully repeat the Odin flashing process, ensuring you have downloaded the correct firmware for your exact model and CSC, and that you are using the
CSC_file (notHOME_CSC_). - Wipe Cache Partition: Sometimes, wiping the cache partition from the recovery menu (which you can access by booting into Recovery Mode – usually Volume Up + Power after powering off) can resolve bootloop issues without needing a full reflash.
- Re-flash Firmware: Carefully repeat the Odin flashing process, ensuring you have downloaded the correct firmware for your exact model and CSC, and that you are using the
- “Custom Binary Locked by FRP” or Similar Errors: These messages often appear if you attempt to flash firmware when Factory Reset Protection (FRP) is enabled and you don’t have the Google account credentials associated with the device. The relocking process with Odin and the
CSC_file inherently performs a factory reset, which should clear FRP. If you encounter persistent FRP issues, you may need to log in with the previously synced Google account during the initial device setup. - Relocking with Magisk Installed: If you have Magisk installed, relocking the bootloader will not remove Magisk. However, the device will likely fail to boot because Magisk modifies the boot image, and a locked bootloader will reject unsigned modifications. To safely relock the bootloader with a history of Magisk usage, you typically need to unroot your device first by flashing the stock
boot.img(or theAPfile from the stock firmware) via Odin and then proceeding with the relock. Alternatively, flashing the official firmware using theCSC_file as described above will overwrite any custom boot image and effectively remove Magisk, allowing the bootloader to relock and the device to boot.
## Conclusion: Restoring Security and Functionality
Relocking the bootloader on your Samsung device is a significant step towards restoring its factory state, enhancing its security, and ensuring compatibility with all manufacturer-specific features and applications. By meticulously following the steps outlined in this guide, including thorough data backups, obtaining the correct official firmware, and utilizing the Odin flashing tool with precision, you can confidently achieve a locked bootloader status.
At Magisk Modules, we advocate for informed decision-making regarding your device’s software. Whether you’re embarking on a journey of advanced customization with our extensive Magisk Module Repository or returning your device to its secure, stock configuration, understanding these fundamental processes is key to a positive user experience. Remember, a locked bootloader is your device’s primary line of defense against unauthorized software, ensuring the integrity and safety of your personal data. We trust this comprehensive guide empowers you to manage your Samsung device with confidence and expertise.