
How to Unlock the Bootloader on Your Lenovo Legion Y700: A Comprehensive Guide for Enhanced Customization
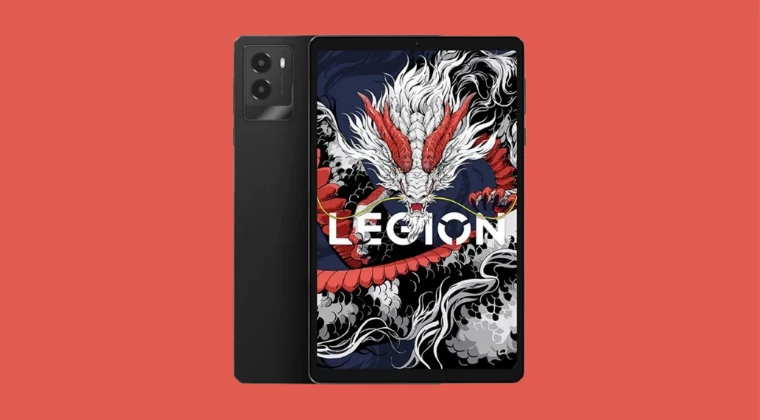
The Lenovo Legion Y700 stands out as a formidable device for gaming and power users, but its true potential often lies beyond its factory settings. For those seeking to delve deeper into system customization, optimize performance, or explore advanced functionalities, unlocking the bootloader is a foundational, yet crucial, step. This comprehensive guide is meticulously crafted to empower you with the knowledge and precise instructions needed to successfully unlock the bootloader on your Lenovo Legion Y700. We understand that this process can seem daunting, but by following these detailed steps, you will be well on your way to unlocking a world of possibilities for your device.
Understanding the Lenovo Legion Y700 and the Significance of Bootloader Unlocking
Before we embark on the technical journey, it’s essential to grasp what the bootloader is and why unlocking it is a gateway to deeper system interaction. The bootloader is a small piece of software that runs when your device first starts up. Its primary function is to initialize the hardware and then load the operating system. Think of it as the initial gatekeeper that verifies and initiates the launch of your Android system.
In its locked state, the bootloader restricts any modifications to the core system partitions, including the recovery and system images. This is a security measure implemented by manufacturers to prevent unauthorized changes and ensure the integrity of the device’s software. However, for tech enthusiasts, developers, and users who wish to root their device, install custom ROMs, custom recoveries like TWRP, or even utilize advanced tools such as Magisk for systemless modifications, this restriction needs to be lifted.
The Lenovo Legion Y700, while a powerful gaming tablet, has specific considerations for users interested in custom modifications. While it boasts impressive specifications for its class, such as a high refresh rate display and robust processing power, its relatively limited battery capacity and the absence of an SD card slot are often cited as minor drawbacks for some users. Unlocking the bootloader allows users to potentially mitigate some of these by optimizing system software, or at the very least, to fully personalize their gaming and multimedia experience beyond the confines of the stock firmware. By unlocking the bootloader, you gain the permission to flash unsigned or modified software, thereby granting you unparalleled control over your Lenovo Legion Y700.
Prerequisites for a Seamless Bootloader Unlocking Process
Embarking on the journey to unlock the bootloader requires careful preparation. To ensure a smooth and successful process, we must gather all the necessary tools and information beforehand. Neglecting any of these steps could lead to complications or data loss, so please pay close attention to the following prerequisites:
1. Data Backup: Your Digital Safety Net
This is arguably the most critical step. Unlocking the bootloader will wipe all data from your device. This includes applications, photos, videos, documents, settings, and everything else stored on your internal storage. Therefore, before proceeding, it is imperative that you back up all your important data.
- Cloud Storage: Utilize services like Google Drive, Google Photos, Dropbox, or OneDrive to back up your photos, videos, and documents.
- Computer Backup: Connect your Lenovo Legion Y700 to your computer via a USB cable and manually transfer your files. Organize them into folders for easy retrieval later.
- App Data: For specific app data, some applications offer their own backup solutions or integration with cloud services. While some apps can be reinstalled, their specific settings and progress might be lost if not backed up.
- Contacts and Calendar: Ensure your contacts and calendar events are synced with your Google account. This is usually enabled by default, but it’s always wise to double-check.
2. Enable Developer Options and USB Debugging
These settings are hidden by default within the Android operating system and are essential for enabling communication between your device and your computer for various development and customization tasks, including bootloader unlocking.
- Navigate to Settings: Open the Settings app on your Lenovo Legion Y700.
- About Tablet: Scroll down and tap on About tablet.
- Build Number: Locate the Build number. It’s often found under “Software information” or a similar sub-menu.
- Tap Repeatedly: Tap on the Build number seven times consecutively. You will see a toast message indicating “You are now a developer!” or “Developer options are now enabled.”
- Return to Settings: Go back to the main Settings menu.
- Developer Options: You will now find a new option, typically labeled Developer options, usually located near the bottom of the main settings list or under a “System” submenu. Tap on it.
- Enable USB Debugging: Inside Developer options, find and toggle the switch for USB debugging. You will likely see a confirmation prompt; tap OK or Allow.
3. Install ADB and Fastboot Tools on Your Computer
Android Debug Bridge (ADB) and Fastboot are command-line tools that allow your computer to communicate with your Android device. They are indispensable for bootloader unlocking, flashing custom recoveries, and many other advanced operations.
- Platform Tools: The easiest way to get these tools is by downloading the official Android SDK Platform Tools directly from the Android developer website. Search for “Android SDK Platform Tools download” to find the official source.
- Extraction: Download the ZIP file for your operating system (Windows, macOS, or Linux) and extract its contents to a convenient location on your computer. A good practice is to create a dedicated folder, for example,
C:\platform-tools\on Windows. - Path Configuration (Optional but Recommended): For easier access from any command prompt or terminal window, you can add the directory where you extracted the platform-tools to your system’s PATH environment variable. This allows you to run
adbandfastbootcommands from any location. Instructions for modifying the PATH vary by operating system.
4. Install Lenovo USB Drivers on Your Computer
To ensure your computer can properly recognize and communicate with your Lenovo Legion Y700 in both normal and bootloader modes, you need to install the appropriate USB drivers.
- Official Drivers: Visit the official Lenovo support website and search for drivers specific to the Lenovo Legion Y700. Look for “USB Drivers” or “ADB Drivers.”
- Installation: Download the driver package and follow the on-screen instructions for installation. In some cases, you might need to manually point your computer’s device manager to the driver location if it’s not automatically detected.
5. A Reliable USB Cable
The quality of your USB cable can significantly impact the stability of the connection between your device and computer. Use the original USB cable that came with your Lenovo Legion Y700 or a high-quality, data-transfer-capable cable. Avoid cheap, unbranded cables, as they can lead to intermittent connections and errors during the flashing process.
6. Sufficient Battery Charge
Ensure your Lenovo Legion Y700 has at least 60-80% battery charge before you begin. A sudden power loss during the bootloader unlocking process can potentially brick your device, making it unusable.
The Step-by-Step Process: Unlocking the Lenovo Legion Y700 Bootloader
With all prerequisites in place, we can now proceed with the actual bootloader unlocking procedure. This involves putting your device into bootloader mode and issuing specific commands from your computer.
Step 1: Connect Your Lenovo Legion Y700 to Your Computer
- Enable USB Debugging: Ensure that USB debugging is enabled in Developer Options on your device (as outlined in the prerequisites).
- Connect: Using your reliable USB cable, connect your Lenovo Legion Y700 to your computer.
- Authorize USB Debugging: On your Lenovo Legion Y700, you will see a prompt asking “Allow USB debugging?” with your computer’s RSA key fingerprint. Check the box that says “Always allow from this computer” and then tap Allow. If you don’t see this prompt, try disconnecting and reconnecting the USB cable or toggling USB Debugging off and on.
Step 2: Verify ADB Connection
This step confirms that your computer can communicate with your device via ADB.
- Open Command Prompt/Terminal: Navigate to the folder where you extracted the ADB and Fastboot tools (the platform-tools folder). Open a command prompt (Windows) or terminal (macOS/Linux) within this folder. You can often do this by typing
cmdin the address bar of the folder on Windows and pressing Enter, or by using the “Open Terminal Here” option if available on your OS. - Execute ADB Devices Command: Type the following command and press Enter:
adb devices - Check the Output: If your device is recognized, you should see a list of devices attached, with your device’s serial number followed by “device.” For example:
If you see “unauthorized,” ensure you have correctly authorized USB debugging on your device. If no device is listed, double-check your USB drivers and connection.List of devices attached xxxxxxxx device
Step 3: Reboot Your Device into Bootloader Mode
The bootloader mode, also known as Fastboot mode, is where we will issue the command to unlock the bootloader.
- Execute ADB Reboot Bootloader Command: With your device connected and ADB recognized, type the following command in your command prompt/terminal and press Enter:
adb reboot bootloader - Device Reboot: Your Lenovo Legion Y700 will now reboot and enter the bootloader mode. The screen might display text information about your device’s status, often indicating “fastboot” or a similar designation.
Step 4: Verify Fastboot Connection
This ensures your computer can communicate with the device while it’s in bootloader mode.
- Execute Fastboot Devices Command: In the same command prompt/terminal window, type the following command and press Enter:
fastboot devices - Check the Output: Similar to the ADB check, you should see your device’s serial number followed by “fastboot.” For example:
If no device appears, there might be an issue with your USB drivers or the connection. Try reconnecting the USB cable or reinstalling the drivers.List of devices attached xxxxxxxx fastboot
Step 5: The Crucial Step - Unlocking the Bootloader
This is the command that will initiate the bootloader unlock process. Remember, this action will erase all data on your device.
Execute the Unlock Command: Type the following command and press Enter:
fastboot flashing unlockNote: Some older devices or specific manufacturer implementations might use
fastboot oem unlockorfastboot oem unlock [unique_key]where a unique key is obtained from the manufacturer’s website. For the Lenovo Legion Y700,fastboot flashing unlockis the standard command.Device Confirmation: On your Lenovo Legion Y700 screen, you will now see a confirmation prompt asking if you are sure you want to unlock the bootloader. This prompt typically presents options like “YES” and “NO” (or similar wording).
Navigate and Confirm: Use the Volume Up and Volume Down buttons on your tablet to navigate the options. Select YES (or the equivalent confirmation option) and then press the Power button to confirm your selection.
The Wipe Process: Once confirmed, your device will proceed to unlock the bootloader and then perform a factory reset, wiping all user data. This process may take a few minutes. The device will then automatically reboot.
Step 6: Initial Device Setup
- First Boot: After the factory reset, your Lenovo Legion Y700 will boot up as if it were brand new. You will need to go through the initial Android setup process, including selecting your language, connecting to Wi-Fi, and signing in with your Google account.
- Restore Data: Once the initial setup is complete, you can begin restoring your backed-up data, reinstalling your applications, and reconfiguring your settings.
Step 7: Verify Bootloader Status
It’s good practice to confirm that the bootloader has indeed been unlocked.
- Re-enable Developer Options and USB Debugging: You will need to go through the steps to re-enable Developer Options and USB Debugging after the factory reset.
- Connect to Computer and Open Command Prompt/Terminal: Repeat Step 1 and Step 2 to ensure ADB is working.
- Reboot to Bootloader Mode: Repeat Step 3:
adb reboot bootloader - Check Bootloader Status: Once in bootloader mode, execute the following command:or
fastboot getvar unlocked(The exact command might vary slightly depending on the Android version and firmware.)fastboot oem device-info - Expected Output: If the bootloader is successfully unlocked, the output should indicate “yes” or display information confirming the unlocked status. For example,
(bootloader) unlocked: yes. If it still shows “no” or a locked status, something may not have gone as planned, and you might need to revisit the steps or consult specific Lenovo resources.
What Comes Next? Leveraging Your Unlocked Bootloader
Congratulations! You have successfully unlocked the bootloader on your Lenovo Legion Y700. This achievement opens the door to a vast array of customization possibilities. Here are some common next steps that many users take:
Installing a Custom Recovery (e.g., TWRP)
A custom recovery is a powerful tool that replaces the stock recovery environment on your device. TWRP (Team Win Recovery Project) is the most popular choice, offering features like advanced backup and restore capabilities, custom ROM installation, and the ability to flash zip files.
- Download TWRP: Find the correct TWRP image file (usually a
.imgfile) specifically for the Lenovo Legion Y700. This is crucial, as using an image designed for a different device can cause serious issues. - Flash TWRP: Boot your device into bootloader mode and use the
fastboot flash recovery twrp.imgcommand (replacetwrp.imgwith the actual filename of your downloaded TWRP image). After flashing, it’s often recommended to immediately boot into recovery to prevent the stock system from overwriting it. This is usually done by selecting “Recovery mode” from the bootloader menu.
Rooting Your Device with Magisk
Magisk is a systemless rooting solution that allows you to gain root access without modifying the system partition directly. This makes it easier to pass SafetyNet checks for apps that require a non-rooted environment and offers a modular approach to customization.
- Download Magisk: Obtain the latest Magisk ZIP file or APK from its official repository (e.g., on GitHub).
- Installation Methods:
- Via Custom Recovery: If you have TWRP installed, you can typically flash the Magisk ZIP file directly through the recovery’s “Install” option.
- Patching Stock Boot Image: Alternatively, you can patch your device’s current boot image with the Magisk Manager app, then flash the patched boot image using Fastboot. This method requires extracting the stock boot image first.
Installing Custom ROMs
Custom ROMs are alternative Android operating systems developed by the community. They can offer different features, performance enhancements, or newer Android versions than the stock firmware.
- Find a Compatible ROM: Search for custom ROMs specifically developed for the Lenovo Legion Y700. Ensure the ROM is stable and well-supported.
- Follow ROM-Specific Instructions: Each custom ROM will have its own installation instructions, which usually involve booting into custom recovery and wiping specific partitions before flashing the ROM and associated GApps (Google Apps).
Exploring Magisk Modules
Once you have Magisk installed, you can explore the vast ecosystem of Magisk Modules. These modules allow you to add new features, tweak system settings, and enhance your device’s functionality without permanently altering the system partition. From systemless Ad-blocking and theming options to advanced performance tweaks and utility tools, the possibilities are extensive. You can find a wide array of modules on repositories like the Magisk Module Repository.
Important Considerations and Potential Risks
While unlocking the bootloader offers immense freedom, it’s crucial to be aware of the potential risks and responsibilities involved:
- Voiding Warranty: Unlocking the bootloader may void your device’s warranty. Lenovo’s specific warranty terms should be consulted for definitive information.
- Security Risks: An unlocked bootloader can make your device more vulnerable if not managed properly. Ensure you only flash trusted software from reputable sources.
- Bricking: While unlikely if you follow instructions carefully, there is always a small risk of “bricking” your device (making it unusable) if the process is interrupted or incorrect files are flashed.
- Software Updates: Official over-the-air (OTA) software updates from Lenovo might fail or cause issues on a device with an unlocked bootloader or custom modifications. You may need to manually flash updates or rely on custom ROM updates.
- Data Loss: As reiterated, the unlocking process erases all data. Always have a complete backup.
By proceeding with caution and diligence, you can navigate these risks and unlock the full potential of your Lenovo Legion Y700. This guide provides the foundational steps for unlocking the bootloader on your Lenovo Legion Y700, paving the way for a truly personalized and enhanced Android experience.