
Unlock Peak Android Performance: Your Definitive Guide to Touch Booster Installation via Brevent (No Root Required)
In today’s fast-paced digital world, a sluggish Android device can be a significant impediment, impacting everything from your productivity to your gaming enjoyment. The frustration of delayed touch responses, stuttering animations, and laggy scrolling is a common pain point for many users. While traditional methods for optimizing Android performance often involve complex procedures like rooting, which carries its own set of risks and complexities, there’s a growing demand for accessible, user-friendly solutions. We understand this need intimately. That’s why, here at Magisk Modules, we are dedicated to providing cutting-edge, accessible tools that empower you to supercharge your Android device without compromising its integrity.
This comprehensive guide is meticulously crafted to introduce you to an exceptionally powerful yet remarkably simple method of enhancing your Android’s responsiveness: installing a Touch Booster using Brevent, all without requiring any form of root access. We will delve deep into the intricacies of this process, offering unparalleled detail and clarity, ensuring that you not only understand how to achieve a faster, smoother Android experience but also why this method is so effective. Prepare to unlock a new level of performance that will redefine your interaction with your mobile device, making every tap, swipe, and game more fluid and instantaneous.
Understanding the Need for Enhanced Touch Responsiveness
Modern smartphones are miniature powerhouses, capable of running demanding applications and complex games. However, the default software configurations and the sheer number of background processes can often create bottlenecks, preventing your hardware from reaching its full potential. This is particularly evident in touch interactions. The journey from your finger pressing the screen to the action being registered and executed on your device involves multiple layers of software processing. Any delay in this chain can manifest as noticeable lag, leading to a degraded user experience.
Gaming enthusiasts are acutely aware of this issue. In fast-paced mobile games, split-second reactions are paramount. A millisecond of delay in registering a touch input can mean the difference between victory and defeat. Similarly, users who frequently navigate complex applications or multitask heavily will appreciate a snappier interface where scrolling is buttery smooth and app switching is instantaneous. Traditional Android optimizations often focus on system-level tweaks that may require advanced knowledge or system modifications. Our goal is to democratize performance enhancement, making it accessible to everyone.
The concept of a “Touch Booster” is to intelligently optimize how your device processes touch inputs, reduce latency, and prioritize foreground activities, especially those demanding immediate responsiveness, like games or drawing applications. By minimizing the overhead and streamlining the input pipeline, a Touch Booster can make your device feel significantly more agile and performant.
Introducing Brevent: The No-Root Solution for Advanced Control
Before we dive into the specifics of installing a Touch Booster via Brevent, it’s crucial to understand what Brevent is and why it’s such a revolutionary tool for no-root Android optimization. Developed with a focus on granular control over application behavior, Brevent allows users to exert a level of influence over their device that was previously only achievable with root privileges.
Brevent functions by leveraging the Android Debug Bridge (ADB) and its ability to interact with applications at a system level. Through ADB commands, Brevent can enable or disable specific application background restrictions, force applications into foreground priority, and manage their lifecycle more effectively. This means you can tell your device to pay closer attention to the apps you’re actively using, ensuring they receive the processing power and responsiveness they need, without requiring modifications to the core Android system.
The beauty of Brevent lies in its no-root nature. This is a critical advantage. Rooting your device voids your warranty, exposes your device to potential security vulnerabilities if not handled with extreme care, and can complicate system updates. Brevent, on the other hand, operates through ADB, a standard Android development tool that is safe and widely supported. It allows for powerful modifications to application management without ever touching the system partitions or requiring privileged access. This makes it an incredibly safe and accessible option for a broad range of users.
We champion tools like Brevent because they embody our philosophy: providing powerful, advanced features in an accessible and secure manner. By enabling Brevent, you’re not just installing a tool; you’re unlocking a new dimension of control over your Android device’s performance.
The Magic of Touch Booster: What It Does for Your Device
A Touch Booster is a specialized tool designed to directly address and mitigate touch input lag. It works by implementing a series of optimizations that streamline the path between your physical touch and the on-screen action. Think of it as a high-speed lane for your touch commands.
Here’s a breakdown of how a Touch Booster typically enhances your Android experience:
- Reduced Touch Latency: The primary function is to decrease the time it takes for your touch to be registered and processed. This is achieved through various methods, including optimizing interrupt handling for touch events and ensuring that the system prioritizes touch-related callbacks. This means when you tap, the action happens almost instantaneously.
- Improved Gaming Sensitivity and Responsiveness: For gamers, this is a game-changer. Reduced latency translates directly to better in-game responsiveness. Your character will react faster to your commands, aiming will be more precise, and the overall feel of playing will be significantly more fluid and enjoyable. Many Touch Boosters also include settings to fine-tune sensitivity, allowing you to find the perfect balance for your favorite games.
- Smoother Scrolling and Animations: Beyond gaming, a Touch Booster can dramatically improve the fluidity of everyday interactions. Scrolling through websites, social media feeds, or long documents will feel noticeably smoother, with fewer stutters or hesitations. UI animations will appear more crisp and responsive.
- Prioritization of Foreground Applications: By intelligently managing background processes, a Touch Booster ensures that the application you are actively using receives the lion’s share of system resources. This prevents background tasks from interfering with foreground performance, leading to a consistently responsive experience.
- Potential for Reduced Input Lag in Specific Apps: While not solely for gaming, certain productivity apps or creative tools that rely heavily on precise input can also benefit. Drawing apps, for example, can feel more natural and responsive.
The effectiveness of a Touch Booster is often amplified when combined with a system like Brevent, which provides the underlying framework to manage application priorities and background activity at a more profound level without root.
Prerequisites for Installing Touch Booster via Brevent
To embark on this journey to a more responsive Android device, you’ll need a few key components and a willingness to follow detailed instructions. The process is designed to be straightforward, but attention to detail is paramount for success.
Here’s what you will need:
- An Android Device: Naturally, you’ll need a smartphone or tablet running an Android operating system. The exact version of Android is generally not a limitation, as Brevent and Touch Boosters are designed for broad compatibility.
- A Computer (Windows, macOS, or Linux): You will need a computer to install and run ADB (Android Debug Bridge) and to push necessary files to your device.
- USB Cable: A reliable USB cable to connect your Android device to your computer. Ensure it’s capable of data transfer, not just charging.
- ADB and Fastboot Tools: These are essential command-line tools that allow your computer to communicate with your Android device. They are part of the Android SDK Platform Tools. We will guide you on how to obtain and set them up.
- Brevent Application: The Brevent application itself needs to be installed on your Android device. We will provide details on where to find and how to install it.
- Touch Booster Application/Module: This is the core component that enhances touch responsiveness. Depending on the specific implementation, this might be a standalone application, a configuration file, or a specialized system component. We will focus on a common and effective approach.
- Developer Options and USB Debugging Enabled: These are crucial settings within your Android device that must be activated to allow ADB communication.
Before proceeding, ensure you have a stable internet connection for downloading necessary software and files. While this process is no-root, it’s always a good practice to back up any critical data on your device before making system-level adjustments, although this method is exceptionally safe.
Step-by-Step Installation: Achieving Peak Performance
This section provides a detailed, step-by-step walkthrough to install and configure your Touch Booster using Brevent. Follow these instructions precisely for the best results.
Step 1: Setting Up ADB and Fastboot on Your Computer
ADB and Fastboot are the backbone of this no-root operation. They enable your computer to communicate with your Android device at a fundamental level.
Download Android SDK Platform Tools:
- Visit the official Android Developers website.
- Search for “SDK Platform Tools” or navigate to the developer tools section.
- Download the latest version for your operating system (Windows, macOS, Linux).
- Extract the downloaded archive to a memorable location on your computer (e.g.,
C:\platform-toolson Windows, or~/platform-toolson macOS/Linux).
Verify ADB Installation:
- Open a command prompt or terminal on your computer.
- Navigate to the directory where you extracted the platform tools. For example, on Windows:On macOS/Linux:
cd C:\platform-toolscd ~/platform-tools - Type the following command and press Enter:
adb devices - If ADB is installed correctly, you should see a list of connected devices. Initially, if no device is connected, it will be empty.
Step 2: Enabling Developer Options and USB Debugging on Your Android Device
These settings allow your device to accept commands from your computer via ADB.
Enable Developer Options:
- Go to your device’s Settings app.
- Scroll down to About phone (or About device).
- Find the Build number entry.
- Tap on the Build number repeatedly (usually 7 times) until you see a message saying, “You are now a developer!” or “Developer options have been enabled.”
Enable USB Debugging:
- Go back to the main Settings menu.
- You should now see a new option called Developer options (it might be under System or a separate category).
- Tap on Developer options.
- Scroll down and find the USB debugging option.
- Toggle it ON.
- You may see a warning prompt. Read it carefully and tap OK to allow USB debugging.
Step 3: Connecting Your Device and Authorizing USB Debugging
Now, let’s connect your device to your computer and establish the ADB connection.
Connect Your Device:
- Connect your Android device to your computer using the USB cable.
Authorize Your Computer:
- On your Android device, you should see a prompt asking, “Allow USB debugging?” This prompt will display the computer’s RSA key fingerprint.
- Tick the box that says “Always allow from this computer” to avoid repetitive prompts.
- Tap Allow.
Verify Connection Again:
- On your computer’s command prompt/terminal, run
adb devicesagain. - This time, you should see your device’s serial number followed by “device” (e.g.,
emulator-5554 deviceorABCDEF123456 device). If it says “unauthorized,” ensure you’ve correctly allowed the connection on your device.
- On your computer’s command prompt/terminal, run
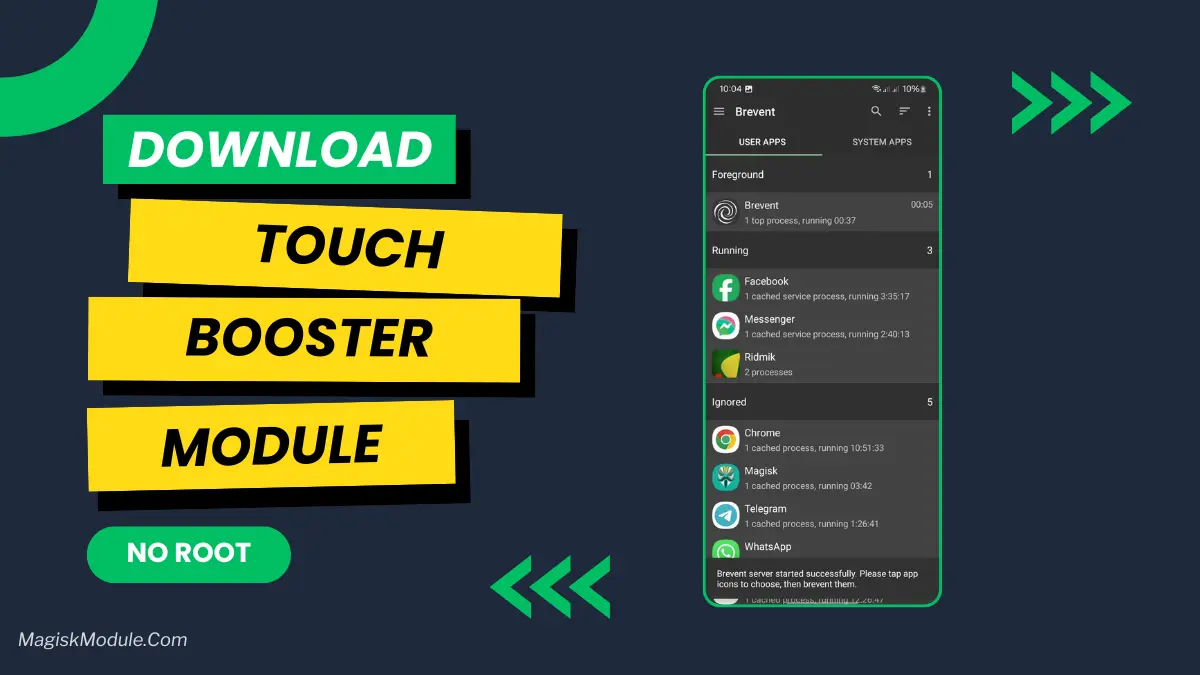
Step 4: Installing and Configuring Brevent
Brevent is the key to enabling advanced application management without root.
Download Brevent:
- You can typically find the latest Brevent APK from its official repository or trusted sources. Search for “Brevent GitHub” or “Brevent APK.” We recommend obtaining it from the official source to ensure authenticity and security. The repository for Magisk Modules often lists reliable apps and tools.
Install Brevent APK:
- Transfer the downloaded Brevent.apk file to your Android device (via USB, cloud storage, or by downloading it directly on the device).
- Open your device’s file manager and navigate to the downloaded APK.
- Tap on the Brevent.apk file to install it. You might need to grant permission to install apps from unknown sources if you haven’t done so before.
Grant Brevent ADB Permissions:
- Once Brevent is installed, open the app.
- It will guide you through the process of granting it the necessary ADB permissions. This typically involves connecting your device to your computer again and running a specific ADB command provided by the Brevent app.
- Follow the on-screen instructions within Brevent. The command will look something like this (executed from your computer’s terminal in the platform-tools directory):
adb shell pm grant moe.shishird.brevent android.permission.WRITE_SECURE_SETTINGS adb shell pm grant moe.shishird.brevent android.permission.PACKAGE_USAGE_STATS - After running these commands, Brevent should indicate that it has the required permissions.
Configure Brevent:
- Within the Brevent app, explore its settings. You can:
- Select Apps to Boost: Choose specific applications (especially games) that you want Brevent to prioritize.
- Enable Background Restrictions: Brevent excels at managing background services. You can configure it to restrict background activity for non-essential apps, freeing up resources.
- Force Stop Unused Apps: This is a powerful feature that automatically force stops apps you haven’t used in a while, preventing them from consuming resources in the background.
- Customizable Presets: Some versions of Brevent offer presets for different scenarios (e.g., “Gaming Mode,” “Battery Saver”).
- Within the Brevent app, explore its settings. You can:
Step 5: Installing and Activating Your Touch Booster
Now, let’s integrate the Touch Booster functionality. The method for this can vary slightly depending on the specific Touch Booster solution you are using. We will outline a common and effective approach, often integrated with Brevent or managed through similar ADB commands.
Method A: Using a Touch Booster APK (If Available)
Some Touch Boosters come as standalone applications.
- Download the Touch Booster APK: Obtain the Touch Booster APK from a reputable source. Again, checking the Magisk Module Repository or its associated links is a good starting point for trusted options.
- Install the APK: Transfer and install the Touch Booster.apk file on your Android device, similar to how you installed Brevent.
- Grant Permissions: Open the Touch Booster app. It might require additional permissions, possibly including ADB permissions if it interacts at a system level. Follow its specific instructions.
- Configure Touch Booster Settings: Within the app, you’ll likely find options to:
- Enable Touch Boost: A master switch to turn the feature on.
- Sensitivity Adjustments: Sliders or presets to fine-tune touch sensitivity.
- Lag Reduction Settings: Options to tweak algorithms for minimizing input lag.
- Game Mode Integration: Some may offer specific profiles for gaming.
Method B: Via ADB Commands (More Common for Advanced Optimization)
Many advanced Touch Boosters are not standalone apps but rather configurations or scripts applied via ADB. Brevent itself can often manage application priorities in a way that significantly boosts touch responsiveness. If a specific Touch Booster requires manual ADB configuration, it will usually provide a set of commands.
- Obtain Touch Booster Commands: If your Touch Booster solution is command-based, you’ll receive a list of ADB commands from its developer. These might involve adjusting system properties or changing application settings.
- Execute Commands:
- Ensure your device is connected and authorized for USB debugging.
- Open your command prompt/terminal in the
platform-toolsdirectory. - Execute each command provided for the Touch Booster one by one. Examples might include:(Note: These are illustrative commands; your specific Touch Booster will have its own unique set).
adb shell settings put system input_event_batch_timeout 2000000 adb shell settings put system touch_event_batch_timeout 2000000 - Some Touch Boosters might require writing specific values to system configuration files, which can be done with commands like
adb shell setpropor by pushing a configuration file and then telling a service to reload it.
Crucial Integration with Brevent:
Regardless of how your Touch Booster is installed, its effectiveness will be greatly enhanced when Brevent is actively managing your device.
- Prioritize Gaming Apps: In Brevent, ensure that your most played games are selected for prioritization. This tells the Android system to allocate more resources and attention to these apps when they are in the foreground.
- Restrict Background Processes: Use Brevent to aggressively restrict background activity for all non-essential applications. This frees up CPU, RAM, and GPU resources that would otherwise be consumed by apps you’re not currently using. This directly benefits the foreground app, including your games or productivity tools.
- Force Stop Idle Apps: Configure Brevent to automatically force-stop apps that have been idle for a set period. This is a critical step in reclaiming system resources.
Step 6: Restart Your Device and Test
After completing the installation and configuration steps, it’s always recommended to restart your device.
- Reboot Your Android Device: Go to Settings > System > Restart, or simply hold down the power button and select Restart.
- Test the Performance:
- Open your favorite games and notice the difference in responsiveness. Pay attention to touch accuracy, reaction time, and overall smoothness.
- Scroll through web pages or social media feeds. You should observe a marked improvement in fluidity.
- Switch between applications and observe how quickly they open and how responsive they feel.
Advanced Tips and Troubleshooting
While this guide aims for a seamless experience, occasional issues may arise. Here are some advanced tips and troubleshooting strategies:
- Check Brevent Status: Ensure Brevent is running and has its ADB permissions correctly set. Re-run the ADB permission commands if you suspect an issue.
- Verify Touch Booster Activation: If you installed a Touch Booster app, confirm it’s running and the boost feature is enabled. If it’s ADB-based, double-check that all commands were executed successfully without errors.
- App-Specific Issues: If you experience problems with a particular app after applying optimizations, try disabling the Touch Booster or adjusting Brevent’s settings for that specific app. It’s possible there’s a conflict.
- ADB Connection Drops: If your ADB connection frequently disconnects, try using a different USB cable, a different USB port on your computer, or ensure your device’s USB settings are not set to “Charging only.” Sometimes, enabling “File Transfer” or “MIDI” mode can help maintain a stable connection.
- Performance Degradation: While unlikely with this no-root method, if you notice a general slowdown, try reverting any changes made by the Touch Booster. If it’s Brevent, you can disable its background restrictions or remove prioritized apps.
- Updating Brevent and Touch Booster: Keep both Brevent and your chosen Touch Booster solution updated to their latest versions. Developers often release patches and performance improvements.
- Understanding System Properties: For advanced users, exploring the effect of
adb shell getpropcan reveal many system properties that might be adjusted by Touch Boosters. However, only modify properties if you are certain of their function and the recommended values. - No Root Needed: We reiterate that this entire process is designed to be no-root. If you encounter steps that demand root access, you are likely using an incorrect method or tool. Stick to Brevent and ADB-based solutions.
The [Magisk Modules] Advantage: Empowering Your Android
At Magisk Modules, our mission is to provide you with the tools and information to maximize your Android device’s potential. We understand the desire for enhanced performance, whether for competitive gaming, smooth multitasking, or simply a more delightful daily user experience. The Touch Booster install via Brevent [no-root] method we’ve detailed is a testament to what’s achievable without venturing into the complexities and risks of rooting.
By leveraging Brevent’s powerful application management capabilities and integrating a dedicated Touch Booster, you are effectively creating a highly optimized environment for your Android device. This ensures that your device prioritizes what matters most: your interaction. The result is a tangible improvement in responsiveness, a reduction in frustrating lag, and a smoother, more fluid interface.
We are committed to curating and recommending tools that are effective, safe, and accessible. The Magisk Module Repository is your trusted source for discovering high-quality modules and applications that can transform your Android experience. Explore our repository for more innovative solutions that empower you to customize and optimize your device to its fullest extent, all while maintaining the security and stability you expect.
Embrace the future of Android optimization – a future that is powerful, accessible, and no-root. With the knowledge gained from this guide, you are now equipped to unlock a new era of performance for your Android device, making every tap and swipe a pleasure.